YOUR SYSTEM IS READY TO TURN ON
Get your Tesla solar system started
We have provided these DIY steps to get your solar system ready to start producing. Please complete these steps in this exact order. Our monitoring team will contact you within 5 business days to ensure your system is working correctly. If you need any assistance, you can contact our Monitoring Hotline at 951-319-4006 to help guide you and answer any questions you may have.
Sunrun customers – Please check your email for instructions for logging into your Sunrun account.
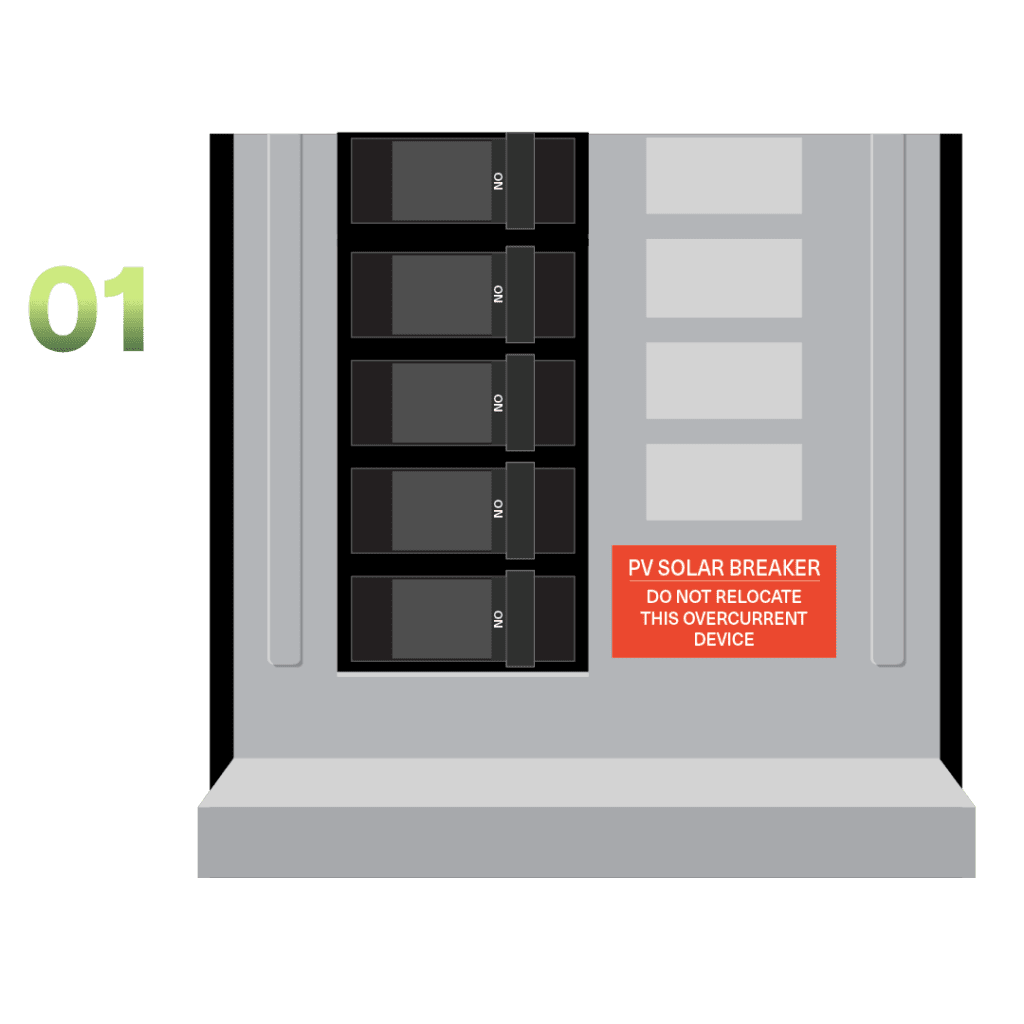
STEP 1.A
Confirm solar breaker is on
Locate the solar breaker within your main electrical panel (indicated by a sticker/label) and ensure that it is in the ‘on’ position.
Important: Only follow step 1.B if you have a Tesla Powerwall 3 battery
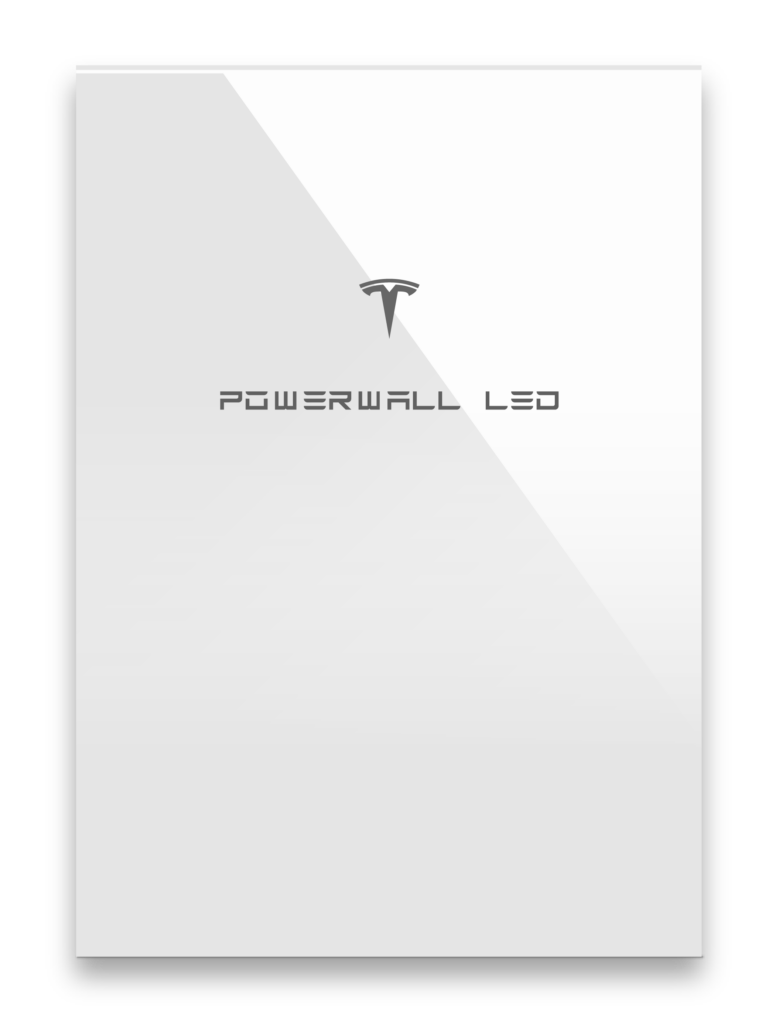
STEP 1.B
Confirm battery status LED indicates normal operation
The Tesla LED logo on the front of your battery will light up indicating status. Please make sure the LED state is solid white, indicating normal operation.
If the Tesla LED logo, located on the front of your battery, is a color other than solid white, please address the issue according to the LED state.
| LED State | Indication |
| Solid white | Normal operation |
| Flashing white | Powerwall 3 is idle. Will enter sleep status if no actions progress |
| Off | Powerwall 3 is off or in sleep state |
| Flashing Red | Inverter (PWS) fault, e.g. AFCI, GFCI, RSD, etc. |
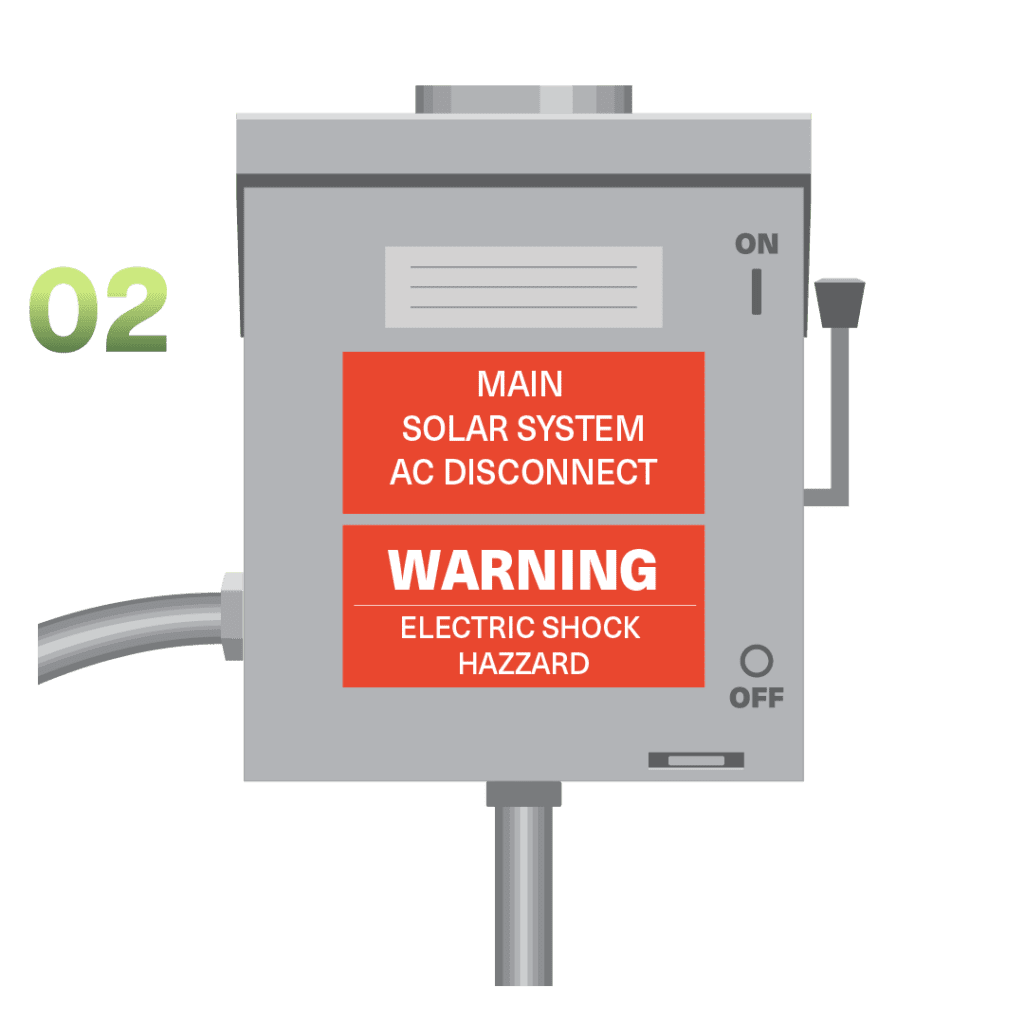
STEP 2
Turn on your AC Disconnect
Locate your AC Disconnect unit and check that the lever on the right side is in the upward position.

STEP 3
Navigate the Tesla App to register your account and verify solar production
Download the iOS or Android Tesla App on your smartphone.
To complete installation, you must register your Powerwall to a Tesla account and connect to your home WiFi. Click here for the instructions.
You can also use the Tesla App to follow your energy production in real time. It may take up to an hour before production is visible.
Only do step 4 if you have at least one Powerwall 3 or Powerwall+ with an integrated solar inverter. When exporting to the grid is permanently not allowed, you will see a “Grid Exporting Restricted” message.
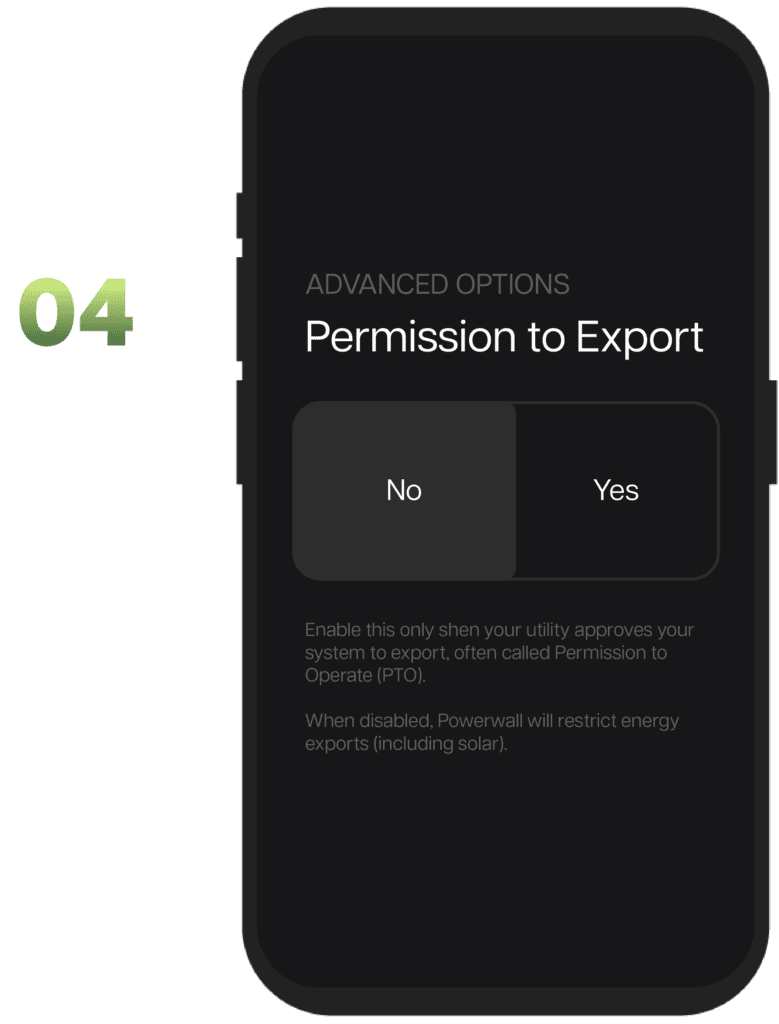
STEP 4
Turn on Permission to Export*
In the app, navigate to your “Advanced Options” within settings.
Turn the “Permission to Export” option to “Yes”
Why? When set to ‘No,’ Powerwall will charge from solar production. When Powerwall is fully charged, solar output will be reduced to match your home loads, preventing export. This will reduce overall solar generation and reduce your reliance on the grid. When set to ‘Yes,’ Powerwall will not adjust charging or solar production to prevent export.
COMPLETE
Your system is ready to start producing
Once all the steps are completed your system will be ready to start producing solar power! Important: You may not see your system producing right away. Our system monitoring team will check back within 5 business days and reach out if your system requires extra support.

Troubleshooting Wifi Connectivity
Did you recently change your wifi, get a new router, or change your password? You may need to update your wifi settings or reconnect within the Tesla app settings.
Have questions?
Want to get in touch? We’d love to hear from you. Here’s how you can reach us…
Call us
Have a question? Get in touch with our Monitoring Hotline to help guide you and answer any questions you may have.
Customer Support Resources
Find quick answers and get in touch with our Customer Support team via our Customer Service Hub.
Monday – Friday, 5am – 5pm PT