YOUR SYSTEM IS READY TO TURN ON
Get your SolarEdge solar system started
We have provided these DIY steps to get your solar system ready to start producing. Please complete these steps in this exact order. Our monitoring team will contact you within 5 business days to ensure your system is working correctly. If you need any assistance, you can contact our Monitoring Hotline at 951-319-4006 to help guide you and answer any questions you may have.
Sunrun customers – Please check your email for instructions for logging into your Sunrun account.
STEP 1.A
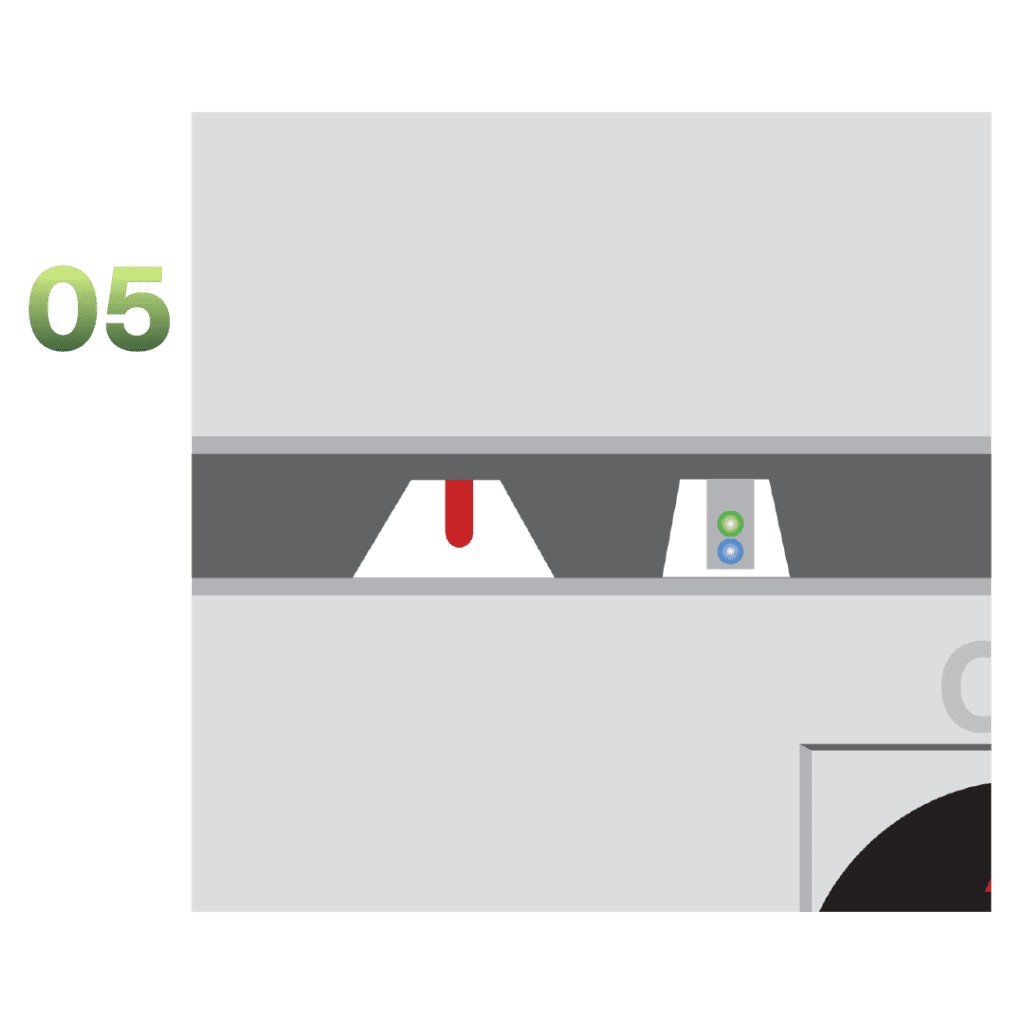
Checking System Status
Locate the system controls and ensure these lights are on and solid:
- Look for a solid green light to indicate production.
- Look for a solid blue light to indicate communication.
Both of these lights should be on. If there are any flashing lights, make sure all switches are in the correct position. If you don’t see the solid blue and green lights, please advance to step two. If you do see them, then your system is operating and you do not need to continue through the rest of these steps.
Only follow step 1.B if you have a SolarEdge home battery
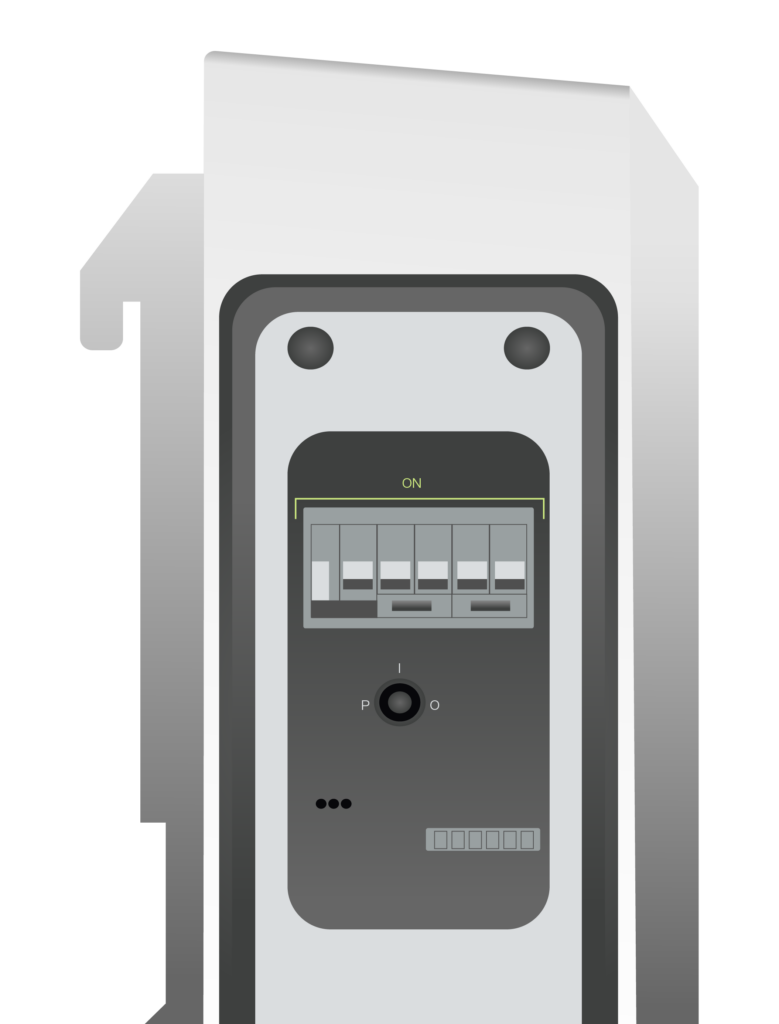
STEP 1.B
Checking Battery Status
To confirm that your battery is ready for activation:
- Check that the battery circuit breaker is ON (top)
- Check that the ON/OFF/P switch is in the ON position (bottom)
For further troubleshooting, follow this link.
Important: Only follow the rest of the steps if you DID NOT see valid status lights from the step above. Otherwise, your system should be working correctly.
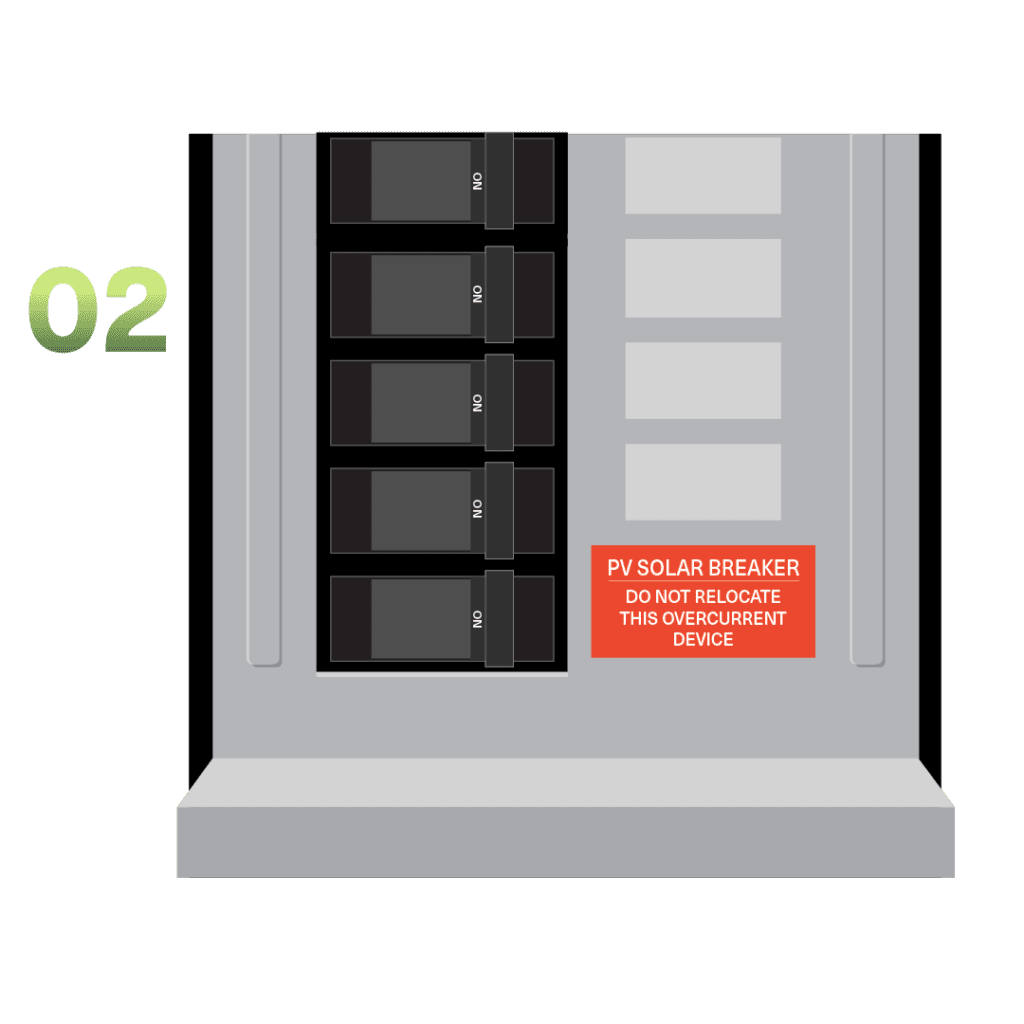
STEP 2
Turn on your solar breaker
Locate your main electrical panel and look for the solar breaker* (indicated by a sticker/label). Ensure the breaker is in the ‘on’ position.
*It is possible that you may not have a solar breaker. If this is the case, please move on to the next step.
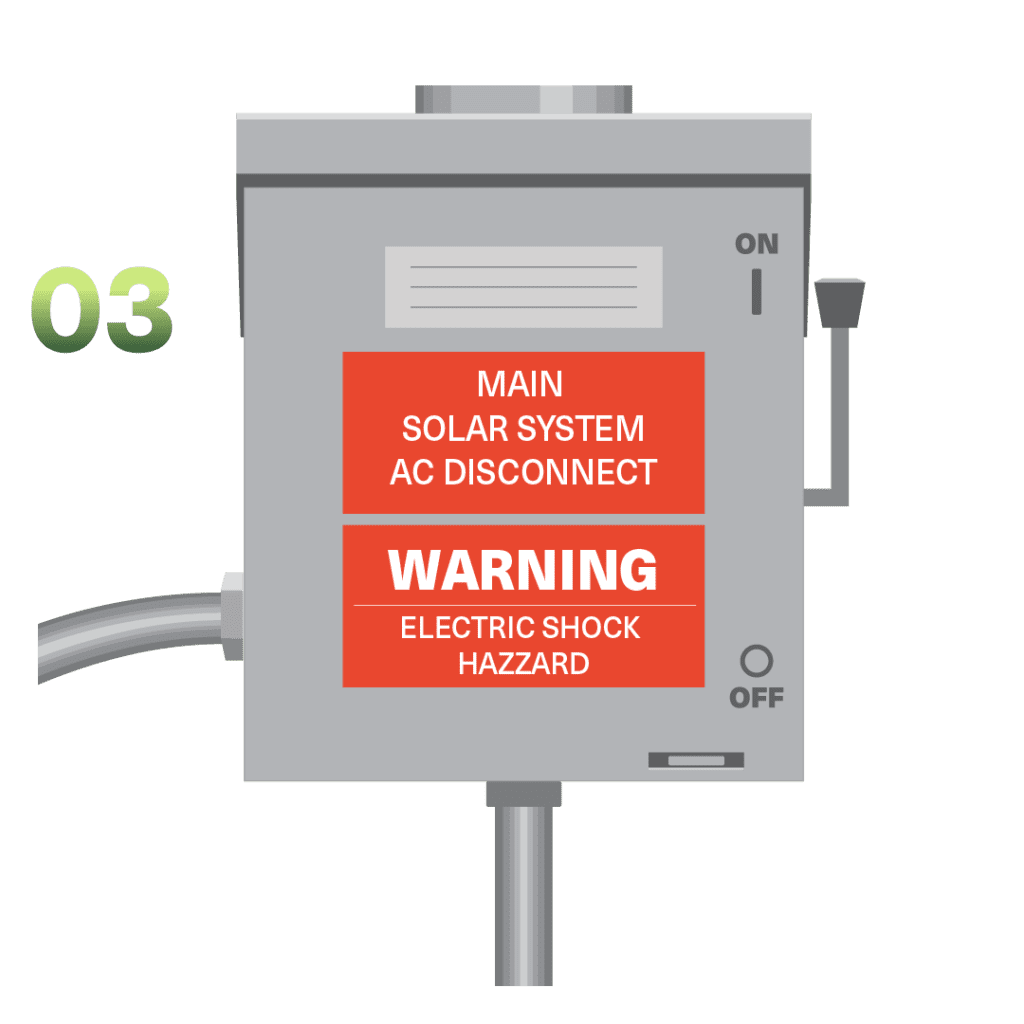
STEP 3
Turn on your AC Disconnect
Locate your AC Disconnect unit. Check that the lever on the right side is up and in the ‘on’ position.
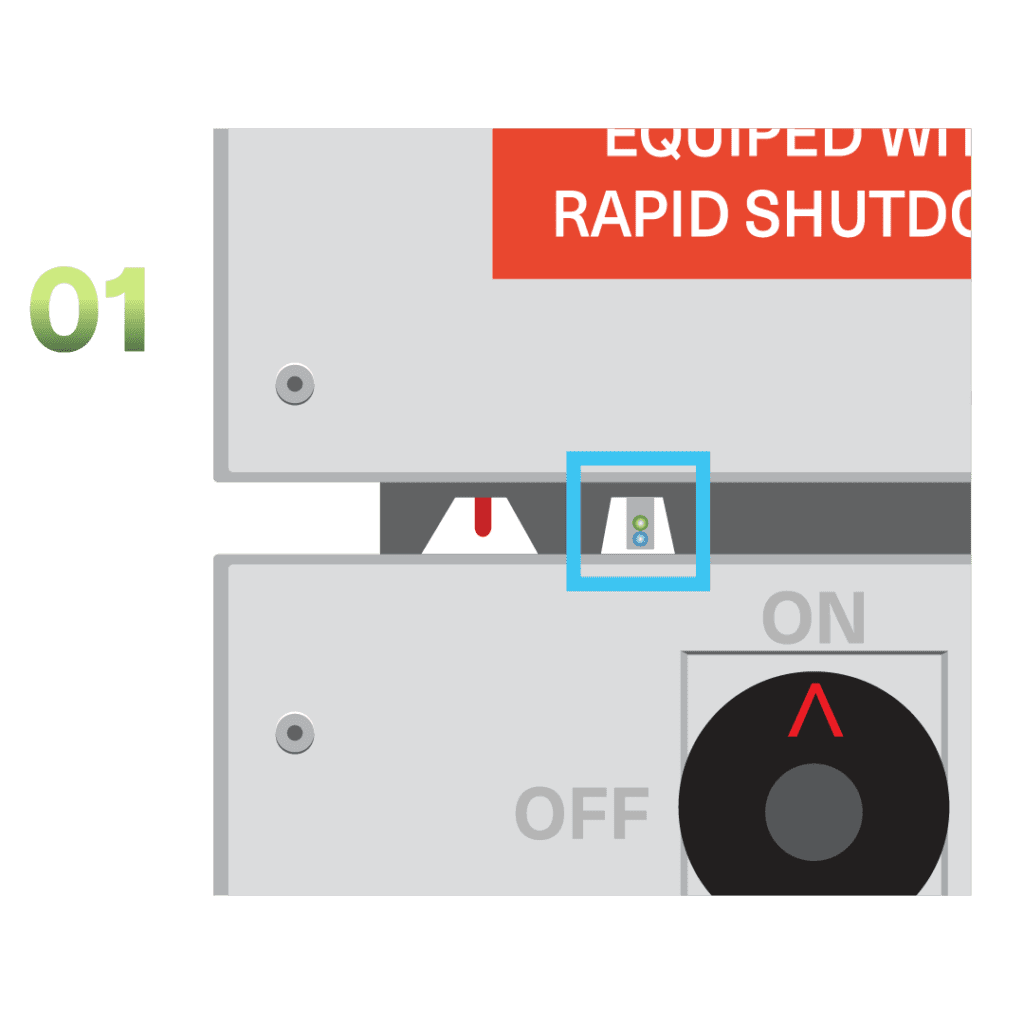
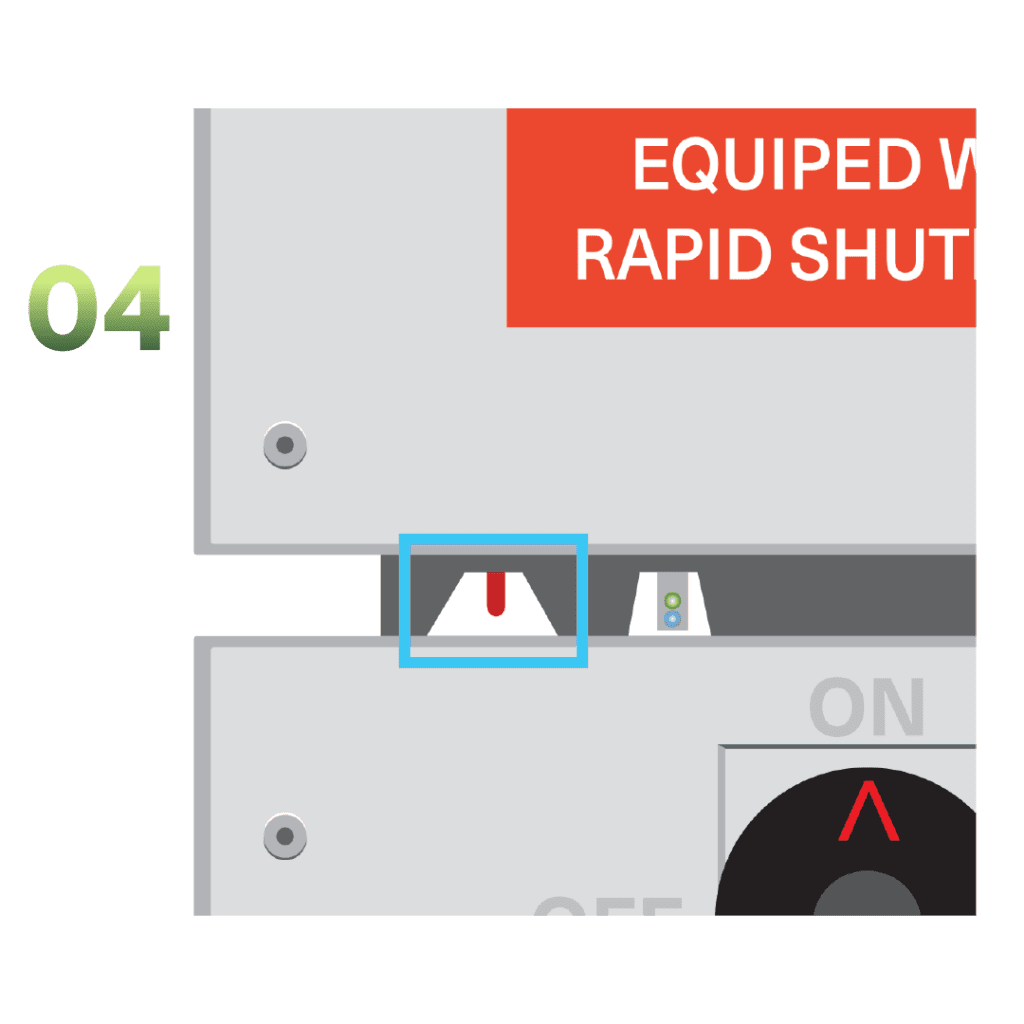
STEP 4
Check the red toggle on the inverter
Above the circular black switch and to the left is a smaller red toggle switch (outlined in blue). This should be in the middle position facing straight up and down.
Note: Please avoid pushing this completely to the left. This will begin a pairing cycle which will result in the inverter taking longer to completely turn on.
STEP 5
Ensure solid green and blue lights
If you must move a position of any of the above, wait an hour for the lights to be solid green and solid blue.
COMLPETE
Your system is now ready to start producing
Once all the steps are completed your system will be ready to start producing solar power! Important: You may not see your system producing right away. Our system monitoring team will check back within 5 business days and reach out if your system requires extra support.

Troubleshooting Wifi Connectivity
Did you recently change your wifi, get a new router, or change your password? You may need to update your wifi settings or reconnect within the SolarEdge app settings.
Have questions?
Want to get in touch? We’d love to hear from you. Here’s how you can reach us…
Call us
Have a question? Get in touch with our Monitoring Hotline to help guide you and answer any questions you may have.
Customer Support Resources
Find quick answers and get in touch with our Customer Support team via our Customer Service Hub.
Monday – Friday, 5am – 5pm PT